

Overview:
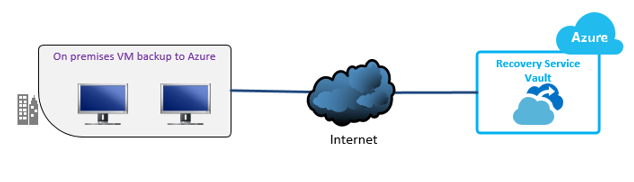
The MARS agent is used by Azure Backup to back up files, folders, and system state from on-premises machines and Azure VMs to a backup Recovery Services vault in Azure. You can run the agent as follows:
- Run the agent directly on on-premises Windows machines so that they can back up directly to a backup Recovery Services vault in Azure.
- Run the agent Azure VMs running Windows (side-by-side with the Azure VM backup extension) to back up specific files and folders on the VM.
- Run the agent on a Microsoft Azure Backup Server (MABS) or a System Center Data Protection – Manager (DPM) server. In this scenario, machines and workloads back up to MABS/DPM, and then MABS/DPM backs up to a vault in Azure using the MARS agent. What you can back up depends on where the agent is installed
Create Recovery Service Vault:
- Sign in to your Azure Subscription in Azure portal
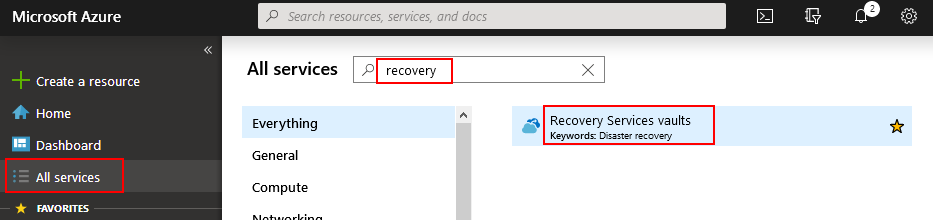
- On the left blade, Select All Services
- In All Services dialog box, key in Recovery Services,
- On the Recovery Service Vault dashboard, select Add

- Provide the name of vault, subscription, RG & Location details
- When you’re ready to create the Recovery Service Vault, select Create

It can take a while to create the Recovery Services vault. Monitor the status notifications in the Notifications area at the upper-right corner of the portal. After your vault is created, it’s visible in the list of Recovery Services vaults. If you don’t see your vault, select Refresh.
Set storage Replication:
- Select your vault resource and go to the Properties

- Click to Update the Backup Configuration in under the BACKUP it will shown the replication type of storage vault.
After choosing the storage option for your vault, you are ready to associate the VM with the vault. To begin the association, you should discover and register the Azure virtual machines.
Download the MARS Agent:
- In the Recovery Service Vault choose your vault and Click backup in left side blade
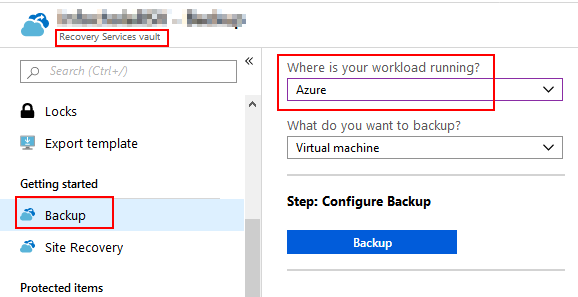
- Choose On-Premises under the workload running blade

- Once selected click to Prepare Infrastructure

- In the Prepare infrastructure blade that opens, click to Download links for Install Recovery Service agent and Download vault credentials. You use the vault credentials during registration of Azure Backup Server to the recovery services vault.

- In the download pop-up menu, click Save. By default, the MARSagentinstaller.exe file is saved to your Downloads folder.
Installing and register the agent:
- Run the MARSagentinstaller.exe file on machines you want to back up.
- In the MARS Agent Setup Wizard > Installation Settings, specify where you want to install the agent, and a location to use for the cache. Then click Next.

- In Proxy Configuration, specify how the agent running on the Windows machine will connect to the internet. Then click Next.

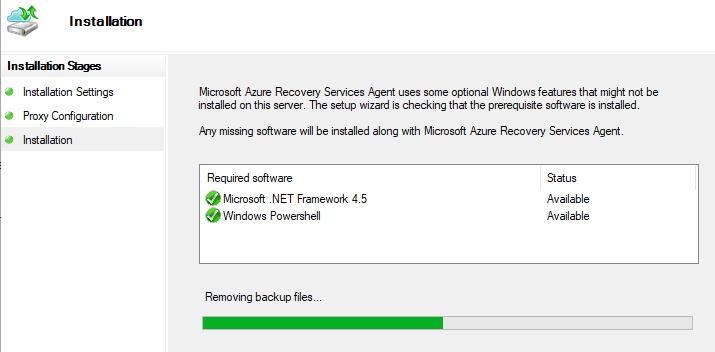
- In Installation review the prerequisites check and click Install.
- After the agent is installed, click Proceed to Registration.
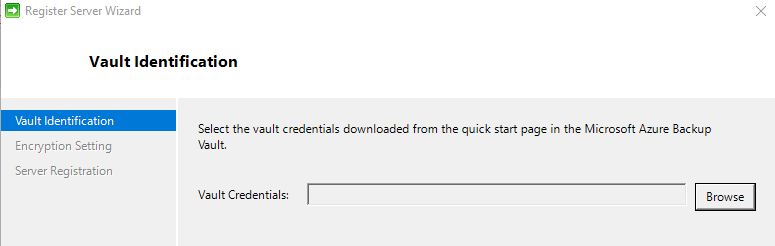
- In the Register Server Wizard > Vault Identification, browse and select the credentials file you downloaded. Then click Next.

- In Encryption Setting, specify a passphrase that will be used to encrypt and decrypt backups for the machine. Note: Save the encryption passphrase in a secure location. If you lose or forget the passphrase, Microsoft can’t help recovering the backup data. Save the file in a secure location. You need it to restore a backup.
- Click Finish. The agent is now installed, and your machine is registered to the vault. You’re ready to configure and schedule your backup.
Create a backup policy:
The backup policy specifies when to take snapshots of the data to create recovery points, and how long to retain recovery points.
• You configure a backup policy using the MARS agent.
• Azure Backup doesn’t automatically take daylight savings time (DST) into account. This could cause some discrepancy between the actual time and scheduled backup time.
Create a policy as follows:
- On each machine, open the MARS agent. You can find it by searching your machine for Microsoft Azure Backup.

- In Actions, click Schedule Backup.
- In the Schedule Backup Wizard > Getting started, click Next.
- In Select Items to Backup, click Add Items.
- In Select Items, select what you want to back up. Then click OK.
- In Select Items to Backup page, click Next.
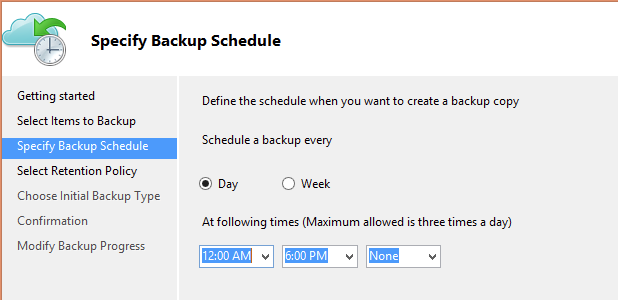
- In Specify Backup Schedule page, specify when you want to take daily or weekly backups. Then click Next.
- You can schedule daily backups, up to three times a day. For example, the screenshot shows two daily backups, one at midnight and one at 6pm.
- You can run weekly backups too. For example, the screenshot shows backups taken every alternate Sunday & Wednesday at 9:30AM and 1:00AM.

- On the Select Retention Policy page, specify how you store historical copies of your data. Then click Next.
-
- Retention settings specify which recovery points should be stored, and how long they should be stored for.
- For example, when you set a daily retention setting, you indicate that at the time specified for the daily retention, the latest recovery point will be retained for the specified number of days. Or, as another example, you could specify a monthly retention policy to indicate that the recovery point created on the 30th of every month should be stored for 12 months.
- Daily and weekly recovery point retention usually coincides with the backup schedule. Meaning that when the backup is triggered according to schedule, the recovery point created by the backup is stored for the duration indicated in the daily or weekly retention policy.
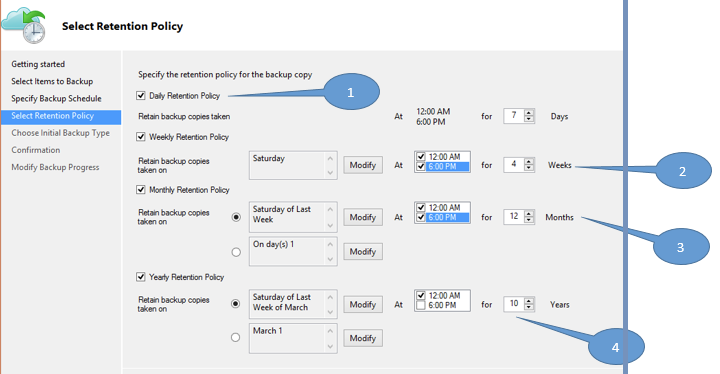
- As an example, in the following screenshot:
- Daily backups at midnight and 6 PM are kept for seven days.
- Backups taken on a Saturday at midnight and 6 PM are kept for 4 weeks.
- Backups taken on Saturday on the last week of the month at midnight and 6 PM are kept for 12 months. – Backups taken on a Saturday in the last week of March are kept for 10 years.
- In Choose Initial Backup Type specify how to take the initial backup, over the network or offline. Then click Next.
- In Confirmation, review the information, and then click Finish.
- After the wizard finishes creating the backup schedule, click Close.
Run an ad hoc Backup:
- In the MARS agent, click Back Up Now. This kicks off the initial replication over the network.
- In Confirmation, review the settings, and click Back Up.
- Click Close to close the wizard. If you do this before the backup finishes, the wizard continues to run in the background. After the initial backup is completed, the Job completed status appears in the Backup console.